Cum sa adaugi o temporizare ecranului de boot in VMWare
Varianta in limba Romana (tradusa de Google).
If you’ve wanted to try out a bootable CD or USB flash drive in a virtual machine environment, you’ve probably noticed that VMWare’s offerings make it difficult to change the boot device. We’ll show you how to change these options.
You can do this either for one boot, or permanently for a particular virtual machine.
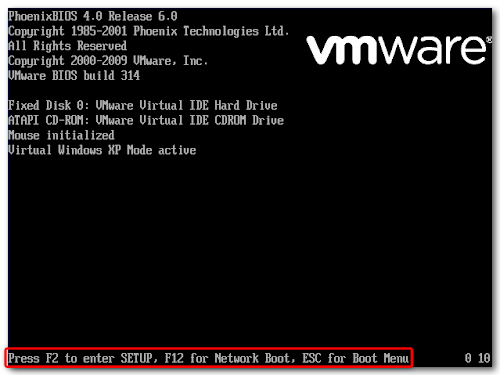
Even experienced users of VMWare Player or Workstation may not recognize the screen above – it’s the virtual machine’s BIOS, which in most cases flashes by in the blink of an eye.
If you want to boot up the virtual machine with a CD or USB key instead of the hard drive, then you’ll need more than an eye’s-blink to press Escape and bring up the Boot Menu. Fortunately, there is a way to introduce a boot delay that isn’t exposed in VMWare’s graphical interface – you have to edit the virtual machine’s settings file (a .vmx file) manually.
Editing the Virtual Machine’s .vmx
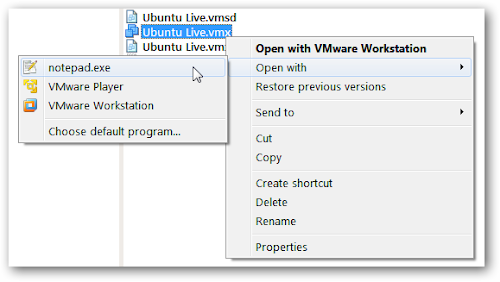
Find the .vmx file that contains the settings for your virtual machine. You chose a location for this when you created the virtual machine – in Windows, the default location is a folder called My Virtual Machines in your My Documents folder.
In VMWare Workstation, the location of the .vmx file is listed on the virtual machine’s tab.
Somewhere in this file, enter in the following line… save the file, then close out of the text editor:
bios.bootdelay = 20000
This will introduce a 20 second delay when the virtual machine loads up, giving you plenty of time to press the Escape button and access the boot menu. The number in this line is just a value in milliseconds, so for a five second boot delay, enter 5000, and so on.
Change Boot Options Temporarily
Now, when you boot up your virtual machine, you’ll have plenty of time to enter one of the keystrokes listed at the bottom of the BIOS screen on boot-up.
Press Escape to bring up the Boot Menu. This allows you to select a different device to boot from – like a CD drive. Your selection will be forgotten the next time you boot up this virtual machine.
Cautare
windows
Meniu principal
Aboneaza-te
- Acasa
- Tips & Tricks
- Windows
- Cum sa adaugi o temporizare ecranului de boot in VMWare


